No products in the cart.
Start Connecting America with Fiber
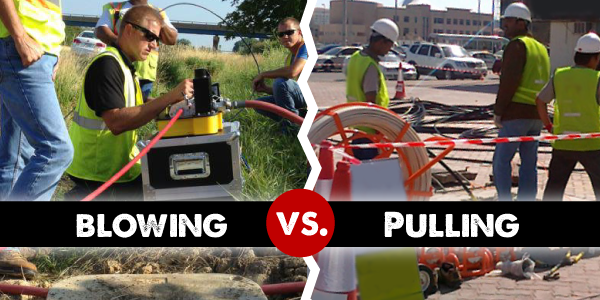
From working at home to school lessons to healthcare visits and even entertainment, the demand for reliable, high-speed internet has exponentially increased since the beginning of the pandemic. After realizing its necessity in everyday life, there has been a boom in economic packages to help connect America with fast reliable internet. One of the best ways to build a broadband network is with fiber optic cable. While there are many methods and practices to building a broadband network, one may wonder how the fiber optic cable gets installed. There are two primary ways: pulling or blowing the fiber optic cable.
Pulling Fiber: It’s Exactly How it Sounds.
Pulling fiber is when fiber optic cable is attached to pre-installed pull tape, to be drawn, manually or mechanically, through a run of conduit. There are many factors to consider when pulling fiber. These factors include the type of cable and conduit, temperature, and the straightness of the run – all affecting how far you can pull fiber through the duct. When pulling, there is potential for cable damage from friction as the fiber moves through the duct. This damage can cause fiber strands to break or result in high loss within the network. Because of these considerations, pulling fiber is best for short distances of a few hundred feet. Fiber pulling is the most traditional and familiar installation method – so more of the Blolabor force has a more robust knowledge base.
Blowing Fiber: Push it Forward.
Blowing fiber, also known as jetting, is when a machine is used to float fiber optic cable through the conduit run by using highly pressurized air to push it forward. While the set-up is more extensive, blowing fiber is great for long distances and can go thousands of feet. As a result, fewer splice points and handholes are needed, which can save on material costs. Additionally, fewer crew members are needed for the fiber installation process which helps save on labor costs, the largest cost associated with fiber network build. However, blowing fiber is a relatively new technology and training is required for proper operation, installation, and maintenance of the equipment.
So… Pulling or Blowing? What to Consider.
There are several considerations when choosing which method of fiber installation to use. Both methods can be used indoors and outdoors but pulling is a better option for shorter distances while blowing is better for longer distances due to potential friction damage. Furthermore, when pulling the run should be fairly straight with little elevation gain/loss. Blowing fiber is better for runs with bends and elevation changes but needs a larger setup area for the equipment. Purchasing equipment for both methods will have large upfront costs and may not be as important to the decision of which method to choose as the other factors. A crew’s knowledge base and existing procedures or a customer’s special requirements may also determine which method to use.
COMPARE THE TWO SIDE-BY-SIDE:

Pulling Fiber: Am I Doing it Right?
Pulling fiber begins by proofing your duct and preparing it for pull tape to be installed. Proofing your duct clears any obstructions that may damage your fiber or hinder the pulling process. There should be at least one person on the puller side running the equipment and one or two people on the opposite side to take the fiber off the reel and feed it into the conduit. On side A, where the fiber installation process begins, one would use a duct rodder and push it completely through to side B to proof the duct. If it hits an obstruction (or multiple obstructions), it needs to be cleared before the pull can continue. On side B, pull tape is attached to the rodder, and the rodder then is pulled back to side A. Pull tape comes in a variety of strengths and is determined by the fiber as to which one to use. Some conduit comes with pre-installed pull tape saving this step but it is always recommended to proof the run before fiber installation.
At side A, the pull tape is then attached to the fiber optic cable. You may choose to use a pulling grip on the fiber for a stronger hold. The fiber/pulling grip is attached to the pull tape at side A using a swivel so each can move independently and prevent twisting that may cause damage. It’s important to note, the pull should not exceed the fiber manufacturer’s tensile-load limit as it can compromise the fiber and its usage life.
There are then several ways to begin pulling the fiber through the duct to side B. If the run is short and straight enough, it can be done manually with one’s hands. However, most fiber pulls are too long to be pulled by hand. That’s when you would need a capstan and capstan wheel can also be used, mounted on the ground or a trailer, with a hydraulic power pack and foot pedal. No matter what method is used to pull the fiber, pulling lube should always be used to reduce friction. Once your fiber is pulled through the conduit, it is recommended that you cut off a large section (about 10 feet for a long run) from the side that was attached to the pull tape. This will remove any fiber that was stretched or damaged throughout the pulling process.
If performing a longer pull, it may be necessary to use an additional fiber puller at intermediate points. If doing so, the fiber should be placed in a “figure 8” pattern, in accordance with its bend radius, before it is pulled into the next duct run. When placing your figure 8 pattern, the end of the cable should be placed on the ground and it may be helpful to have a tarp underneath to keep it clean. This helps to help ensure a smooth pull by preventing twisting and debris from getting into the duct run.
One benefit to using a puller is that the capstan wheel can pull different sized fiber. So while your pull tape strength is dependent on fiber size, your capstan wheel is not and can be used for multiple fiber sizes. However, using a larger wheel can help increase your pulling speed and efficiency. Pulling fiber is also great for jobs where there is limited space to set up equipment as it takes up a smaller footprint.
What to Use:
- As a distributor, we recommend the GMP Sidewinder Puller.
- Plus, don’t forget the accessories – Duct Rodders.
Blowing Fiber: Here’s the How-to.
Blowing fiber begins by setting up and configuring your blowing machine. The blower needs to have the correct configuration for your fiber and duct sizes; these parts will change depending on your fiber diameter and conduit size. Make sure to have the right collets, clamps, plugs and seals on hand before you begin set-up. A hydraulic power pack and air compressor will also need to be set-up with your blowing machine. Once the equipment is ready, proof your duct by blowing a duct projectile or sponge through the conduit run to remove any debris or obstacles.
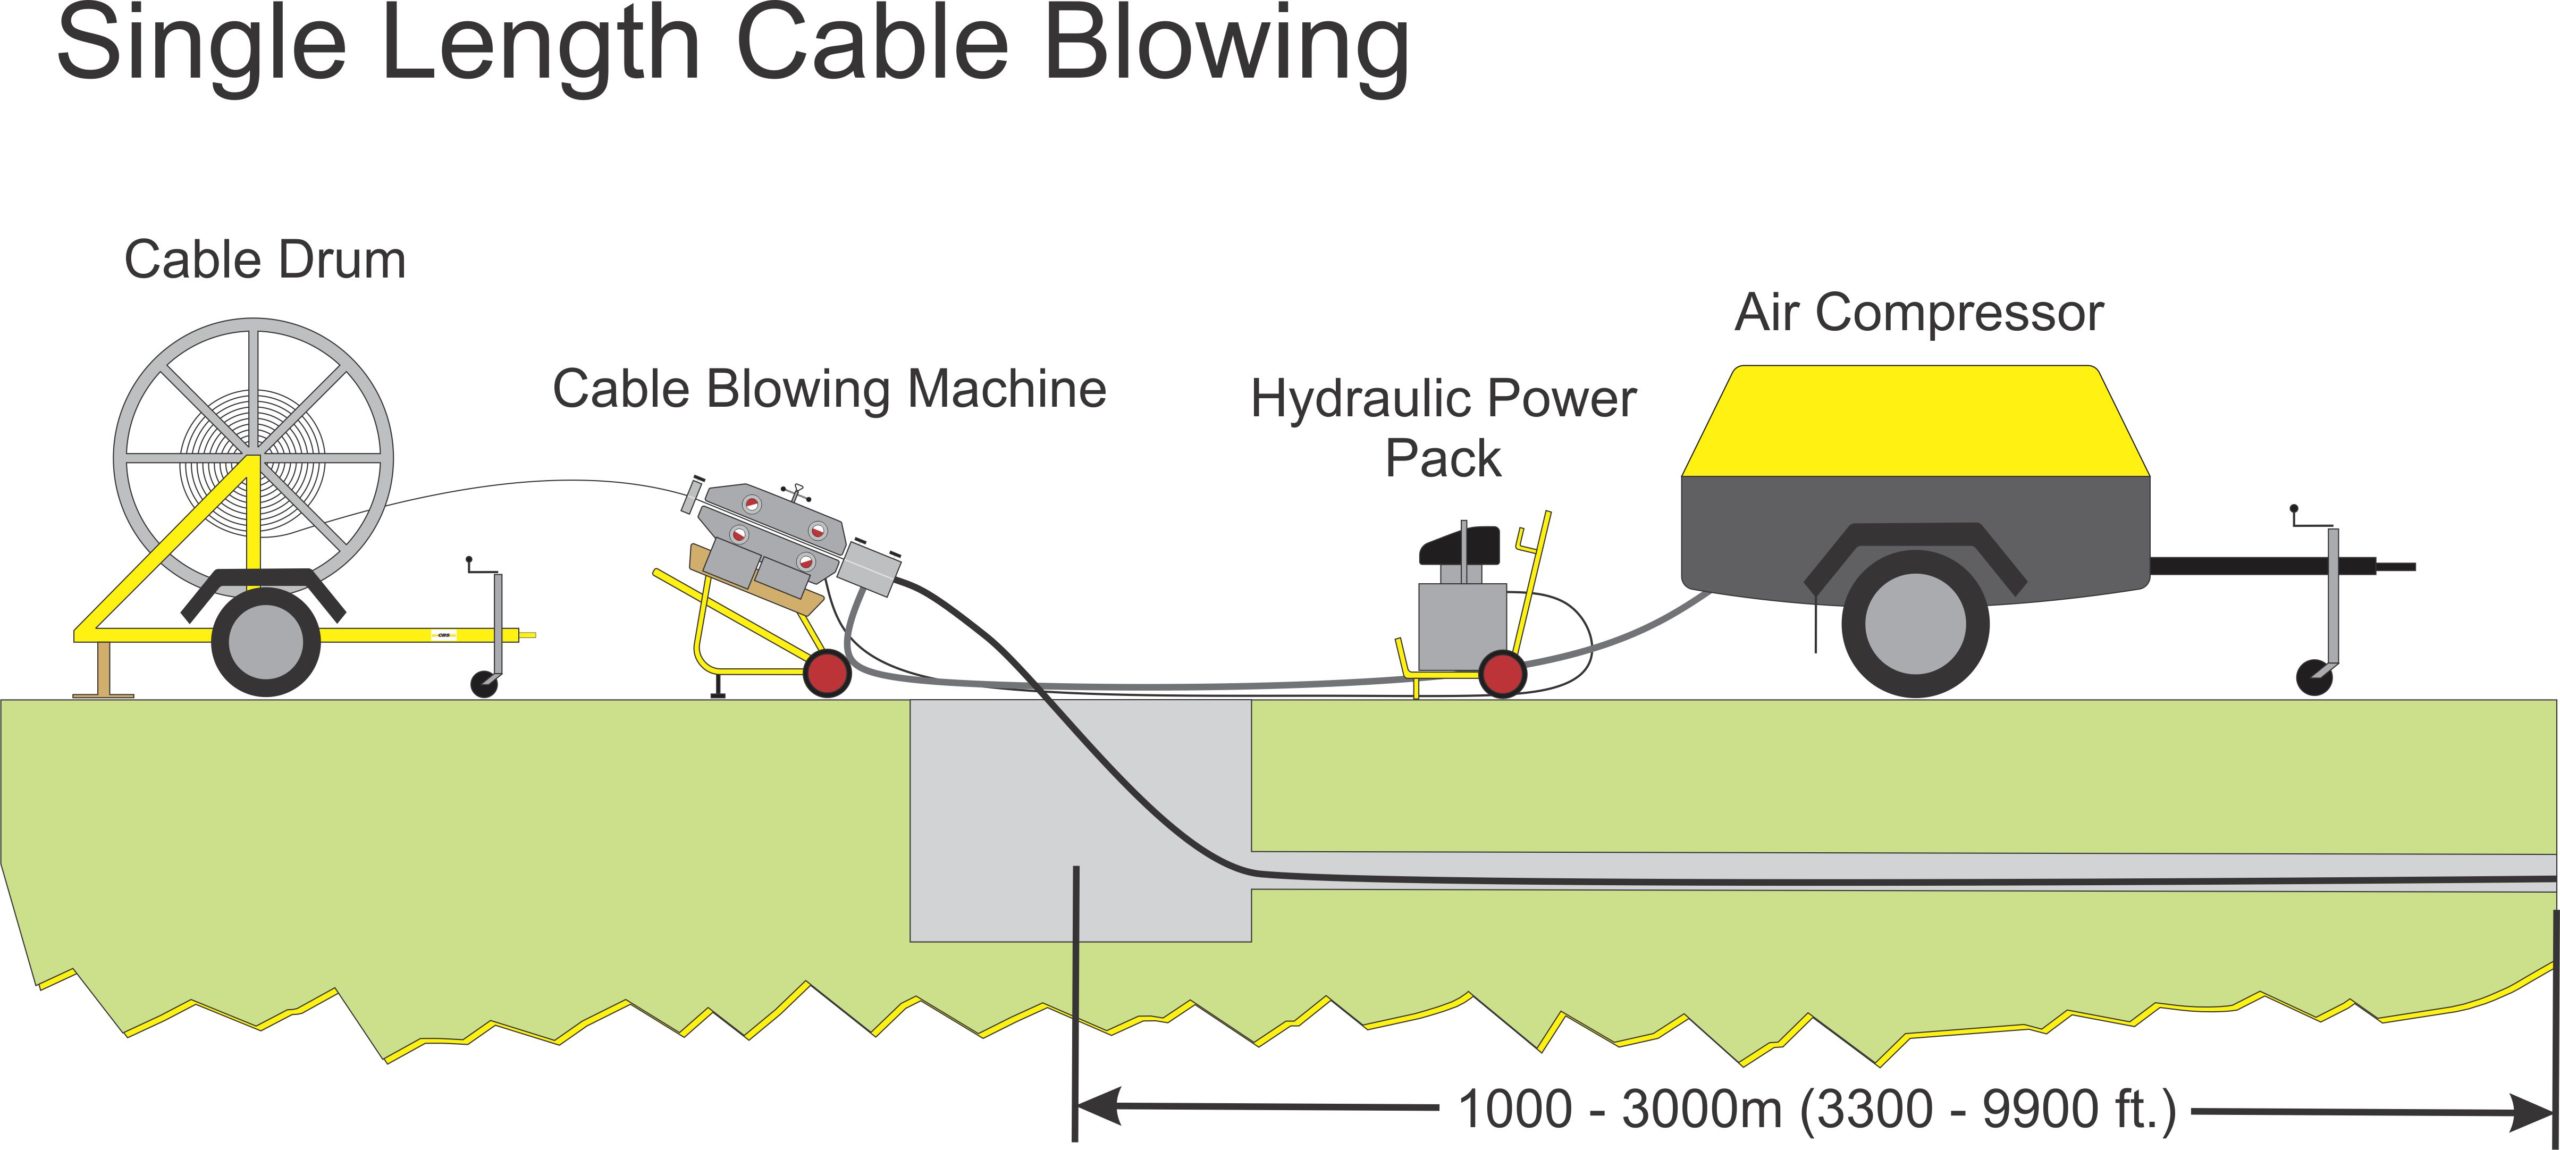
Photo Credit: GMP
Before you begin blowing fiber, you may also want to perform a crash test to establish the integrity of the duct. This is especially important if you are new to blowing fiber or have a new machine. To perform a crash test you feed an object, which could be a small amount of fiber, into the duct to simulate what would happen if the fiber runs into an obstacle while you are blowing. The test is helpful to see how the machine reacts and what to look for in the gauges if an object is hit. Pay attention to see if the air pressure increases or if the fiber slows down. It is recommended to do a crash test at least a few times while learning how to install blown fiber. An experienced crew may not need to do this step if they already know what to look for on their machine when fiber hits an obstruction within the conduit.
After your duct is proofed and your crash test is performed, you will begin to prepare your fiber. A cable grip should be attached to the end of the fiber as well as a carrier or parachute, sized accordingly. This allows the compressed air to push the parachute through the conduit while the carrier then pulls the attached fiber. Blowing lube should be applied to the opening of the duct before the fiber starts as well as to the fiber as it enters into the duct. After the fiber is properly prepared, it should be pushed into the duct a few hundred feet using the tracks on the machine without having the air compressor on. At least one person is needed to watch the machine and the gauges for proper operation and then a second person to watch the fiber to make sure it is coming off the reel properly and then receive it once it is near the end of the run. After making sure the machine is running smoothly, and the fiber is in a couple of hundred feet, the air compressor should be turned on for the remainder of the installation. An experienced crew can blow nearly 2-3 miles of fiber in a few hours.
Blowing fiber has many benefits. While it may take longer for the initial set-up, the installation is faster. Plus, the cable can go a few thousand feet in one run, making it very efficient. This means there are fewer touch points along the run and therefore less time is spent on set-up. You can also set up mid-distance assist blowers to go even farther. Blowing also puts less strain on the fiber resulting in a smaller chance of damage to the fiber and is the preferred method if the duct run has multiple bends and undulations. It is also possible to overblow cable, which is blowing in more fiber into an existing occupied duct since there is a reduced chance of friction as the cable floats in the air. Blowing is also the recommended method for MicroTechnologies installation.
What to Use:
- For blowing traditional fiber, we recommend the Tornado Plus Fiber Blower.
- For blowing MicroFiber, we’d recommend Hurricane Plus Fiber Blower.
- See what fiber blowing accessories are available.
So What’s the Best Method?
Both methods of installing fiber optic cable have their pros and cons. It is important to choose the right method based on each installation job. For shorter distances and limited space jobs, we’d recommend using the pulling method. We’d recommend blowing fiber for longer distances and more efficient jobs.
If you’re not sure which is best based on your project or job – we’re here to help!
We’ve been in the business a long time and know a thing or two about best practices. Whether you need advice on your build, high-quality materials to build it, or even a fiber pulling or blowing demo, Millennium has your back.